
The CancerTool automates the process of incorporating your full/system scans, your cancer scans, and your target cancer programs into the Cancer Protocol. Before you use the presets created by the CancerTool, run the Terrain protocol found in the Presets tab of Spooky2 under >Detox, and documented in GUIDE Terrain Protocol – Click Me.pdf. The effectiveness of the Terrain protocol is enhanced if you also run the Contact, Plasma, Scalar, or Coil presets in addition to the Remote presets.
The factory Cancer Protocol is found in the Presets tab of Spooky2, under >Cancer, >DB, GUIDE Cancer DB – Click Me.pdf. Because I recommend doing the Terrain protocol first, you can skip Steps 1-5 of the DB Cancer protocol, which comprises the Terrain phase of the Cancer protocol. The CancerTool creates the presets for the Cancer phase of the protocol, which are Steps 6-8, and for Step 9, you use the factory presets without modification.

If you haven’t already, install CancerTool as described in Installing CancerTool. Double-click the CancerTool icon to start CancerTool. Before you use CancerTool for the first time, you need to do two biofeedback scans, a full/system scan and a cancer scan. You also need to create a targeted Cancer preset for your specific cancer.
Learning Biofeedback
To learn how to do a biofeedback scan in Spooky2, there are two tutorials in the Spooky2 User’s Guide. You can bring up the Spooky2 User’s Guide from the Spooky2 software by choosing the User’s Guide menu command in the Help menu.
For GeneratorX, run through the tutorial called Lesson 6: GeneratorX Biofeedback Scan. This tutorials will run you through the basics of the biofeedback process. When doing the scans for CancerTool, when the Scan Results window appears, you can simply dismiss the Scan Results window and end the tutorial, as the CancerTool does not need the steps after the Scan Results window appears. For more in-depth information, see Biofeedback Scanning in the Spooky User’s Guide.
With the Spooky Pulse, run through the tutorial called Lesson 7: Spooky Pulse Biofeedback Scan. Again, when the Scan Results window appears, you can quit the tutorial and dismiss the Scan Results window, as the CancerTool does not need the steps after the Scan Results window appears. There is more Spooky Pulse information in the Presets tab of Spooky2, under >Biofeedback, >Spooky Pulse, GUIDE Scanning – Click Me.pdf.
The Full/System Scan
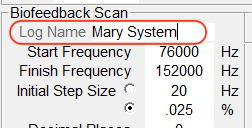
The full/system scan finds various viruses, bacteria, parasites, and other pathogens in your body. Before you start the scan, put into the Log Name field some indicator if the kind of scan, in this case, a System scan, and if there are multiple users, the person’s name who is being scanned. Use the following biofeedback presets for the full system scan.
| Biofeedback Hardware | Scan Preset | Notes / TENS pad placement |
|---|---|---|
| Spooky Pulse | \Biofeedback\Spooky Pulse\General\General Purpose Full System Scan – JW | Right wrist and left ankle. |
| GeneratorX | \Biofeedback\GeneratorX\GX General Biofeedback Scan with Baseline (C) – JW | On the sides of the torso at the level of your intestines. |
| Scalar Digitizer | \Biofeedback\Scalar Digitizer\Spooky2 Scalar Digitizer Master (GX) – JW and \Biofeedback\Scalar Digitizer\Spooky2 Scalar Digitizer Slave (GX) – JW |
On the sides of the torso at the level of your intestines. |
| Sample Digitizer | \Biofeedback\Sample Digitizer\General Biofeedback Scan (SD) – JW | Effectiveness is limited by the pathogens available in fluid sample. |
The Cancer Scan
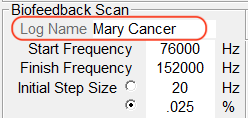
The cancer scan finds frequencies specific to cancer. Before you start the scan, put into the Log Name field some indicator of the kind of scan, in this case, a Cancer scan, and if there are multiple users, the person’s name who is being scanned. Use the following biofeedback presets for the cancer scan.
| Biofeedback Hardware | Scan Preset | Notes / TENS pad placement |
|---|---|---|
| Spooky Pulse | \Biofeedback\Spooky Pulse\Cancer\zCancer Scana 1500000-1700000 (C)(R) – EV | Right wrist and left ankle. |
| GeneratorX | \Biofeedback\GeneratorX\GX General Biofeedback Scan with Baseline (C) – JW | Cancer is between the TENS pads |
| Sample Digitizer | \Biofeedback\Sample Digitizer\General Biofeedback Scan (SD) – JW | Fluid sample must contain cancer cells. |
The Targeted Cancer Preset
You must also create a preset that contains your targeted cancer programs. You can start with the shell preset \Shell (Empty) Presets\Remote\Killing (R) – JW, then add the cancer programs that target your specific cancer (i.e., breast cancer, prostate cancer, etc.). Save this preset into the User folder. Don’t place the preset in a subfolder inside the User folder.
Building Your Cancer Presets
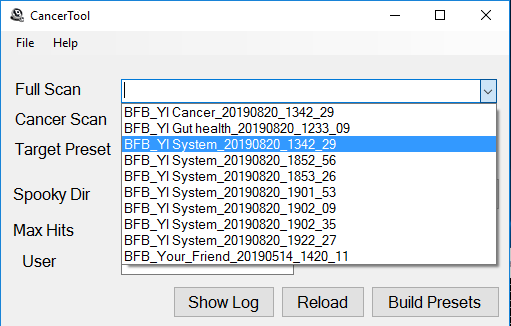
After you’ve finished your full/system and cancer scan in Spooky2, bring up the CancerTool. Click on the down arrow on the combo box next to the Full Scan label, a menu will appear that has a list of the choices of biofeedback scan data files to choose (see the image to the right). Choose the newest full/system scan data file. If you don’t see your recent scans in the menu, click the Reload button to load the current contents of the database into the utility.
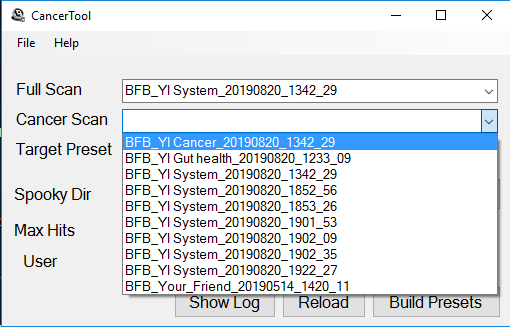
Next choose your cancer scan in the combo box next to the Cancer Scan label.
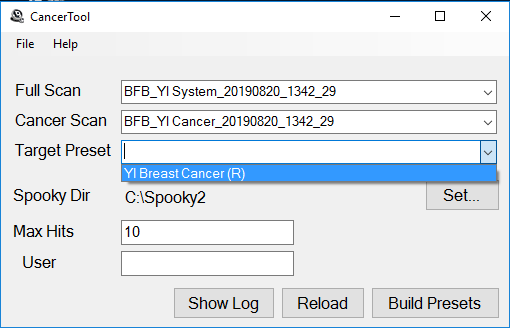
Now choose your targeted cancer preset in the combo box next to the Target Preset label. For more information, click here.
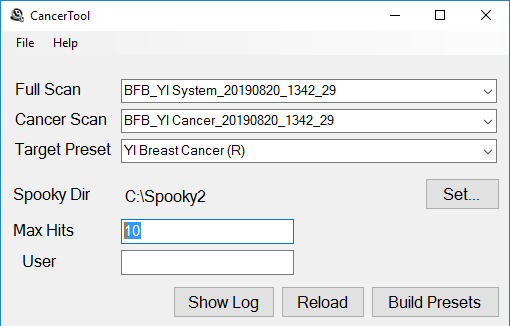
The optional Max Hits field is the number of the top frequencies to use. The default value is 10 hits.
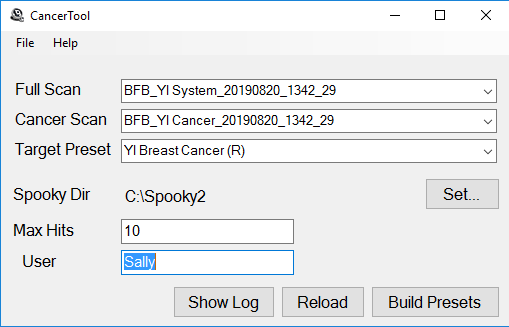
The optional User field is a user name if you are treating more than just one person. When set, the User name is prepended to the presets that are generated by CancerTool.
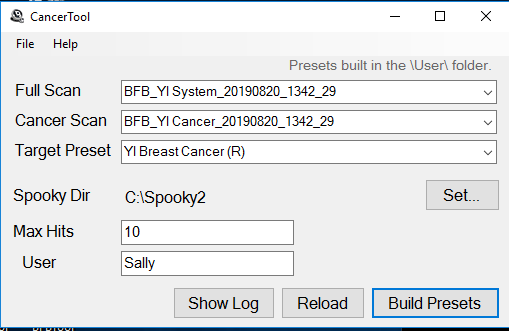
Once all fields are set, click the Build Presets button to build your presets.
If the Build Preset operation is successful, you see a status message in the top right part of the window that says “Presets built in the \User\Cancer\ folder.”
The following table describes the function of the remaining buttons in CancerTool.
| Button Name | Function |
|---|---|
| Show Log | Click Show Log to see the frequency results of the last Build Presets operation. See a description of the Show Log results here. |
| Reload | Click Reload to refresh the entries in the Full Scan, Cancer Scan, and Target Preset list. See a description of this button here. |
| Build Presets | Build Presets creates the presets for this protocol. This is described earlier here. |
| Set… | Click the Set… button to change the Spooky Dir location. Most people will not need to use this command, as the default value is the default Spooky Dir. But if you install your Spooky2 software into a different directory, use this button. |
Preferences
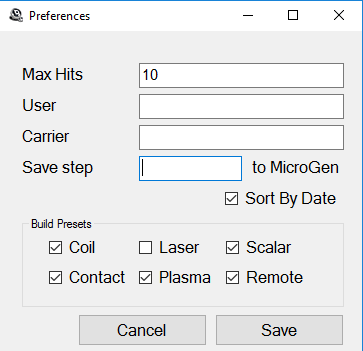
You set startup preferences for the CancerTool by choosing the Preferences… menu item in the File menu. Here is the Preferences dialog.
Max Hits and User are the default values for Max Hits and User in the main window. Carrier is the default minimum carrier frequency for Contact presets. If empty, the default value is 1000000 (1 MHz). Save step [] to MicroGen saves the step of the Cancer protocol you select to the MicroGen Custom.csv when you click Build Presets. This Cancer protocol step value must be between 6 and 8. Sort By Date affects the sorting order of the Full Scan and Cancer Scan fields. If set, those fields will sort by date in descending order.
The Build Presets checkboxes choose which presets are generated via the Build Presets button. If you only have Contact and Remote modes available, you may wish to untick the Coil, Plasma, and Scalar checkboxes, then click the Save button.
Running the Cancer protocol
Now that you’ve built your first presets, you can now run them. The generated presets are found in \User\Cancer\ in the Presets tab, the remaining presets are in \Cancer\DB\. If you have 2 generators, you run the following:
| Step | Scan & Build Presets | Days | Generator 1 | Generator 2 |
|---|---|---|---|---|
| 6 | Yes | 4 | ALL Detox (R) – DB* | C06 Cancer A – DB or P06 Cancer A – DB or S06 Cancer A – DB or M06 Cancer A – DB and when finished, run R06 Cancer A – DB |
| 7 | Yes | 4 | C07 Cancer B – DB or P07 Cancer B – DB or S07 Cancer B – DB or M07 Cancer B – DB and when finished, run R07 Cancer B – DB | |
| 8 | Yes | 4 | C08 Cancer C – DB or P08 Cancer C – DB or S08 Cancer C – DB or M08 Cancer C – DB and when finished, run R08 Cancer C – DB | |
| 9 | No | 2 | Overnight Contact Sweep (C) – DB** or P09 Cancer Sweep (P) – JW*** and when finished, run Spectrum Cancer Sweep (R) – DB* |
found in \Cancer\DB\Remote
** found in \Cancer\DB\Contact
*** found in \Cancer\DB\Plasma
If you have 3 generators, here is the schedule.
| Step | Scan & Build Presets | Days | Generator 1 | Generator 2 | Generator 3 |
|---|---|---|---|---|---|
| 6 | Yes | 4 | R06 Cancer A – DB | ALL Detox (R) – DB* | C06 Cancer A – DB or P06 Cancer A – DB or S06 Cancer A – DB or M06 Cancer A – DB |
| 7 | Yes | 4 | R07 Cancer B – DB | C07 Cancer B – DB or P07 Cancer B – DB or S07 Cancer B – DB or M07 Cancer B – DB | |
| 3 | Yes | 8 | R08 Cancer C – DB | C08 Cancer C – DB or P08 Cancer C – DB or S08 Cancer C – DB or M08 Cancer C – DB | |
| 9 | No | 2 | Spectrum Cancer Sweep (R) – DB* | Overnight Contact Sweep (C) – DB** or P09 Cancer Sweep (P) – JW*** |
found in \Cancer\DB\Remote
** found in \Cancer\DB\Contact
*** found in \Cancer\DB\Plasma
Note: Before running Step 6, 7 or 8, you must do a full system scan and a cancer scan first, and then build presets to run for the next 4 days.
Note: For the non Remote presets, you ought to run these presets as much as possible during the day, and run them overnight if possible.
I’ve added a new scan or new preset but I don’t see it?
If you’ve done a recent system scan, but don’t see your new scan data file in the combo box, click the Reload button to read in the ScanData directory again.
How can I tell when I last created the presets?
If you load the generated presets in \User\Cancer\, the Preset Notes will contain the create date.
How are my frequencies chosen?
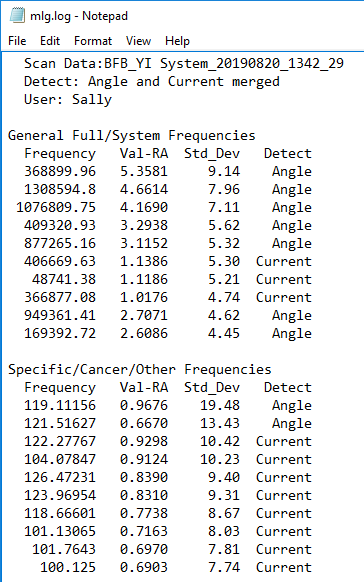
The CancerTool runs an analysis of the Current and Angle data for GeneratorX scan results, and the BPM and HRV data for the Spooky Pulse scan results. The best results are chosen from these two analyses using the ratio of the measured Value – RunningAverage divided by the standard deviation for that data. This calculated ratio makes it possible to determine the relative strength of data from two different sources (i.e., Current/Angle or BPM/HRV).
When you click the Show Log button, the Notepad window that appears first has the analysis for Angle, then the analysis for Current, then the merged Angle and Current results (for GeneratorX).
How do I create presets for multiple users?
By default all presets that are created start with the text R0, C0, P0, S0, and M0. If you are creating presets for different users, you don’t want the 2nd person’s presets overwriting the 1st person’s presets. To avoid this, type each person’s name into the User field before clicking Build Preset. If you type Joseph into the User field and click Build Presets, the new preset will all start with Joseph R0 or Joseph C0, etc.
Preset Optimizations
There are some optimizations the CancerTool does in the Plasma and Contact presets for a stronger treatment.
The presets for Plasma can have up to two chained presets per program; one for the frequencies under 100 kHz using the shell preset Spooky Plasma Entrainment and Healing (P) – JW, and one for the frequencies 100 kHz and larger using the shell preset Spooky Plasma Advanced (P) – JW. By using the different shell presets for the low and high frequencies, you get the strongest plasma signal for each of these ranges of frequencies.
The preset for Contact will use a dynamic carrier to create a carrier wave that is over 1 MHz. This allows for deeper cellular penetration of the Contact frequencies.