
DBEditor is a database editor for Spooky2 custom databases. It can create a database, edit an existing database, import databases (via a menu command or drag-and-drop), import presets into a database (via a menu command or drag-and-drop), search a built-in frequency database and add built-in programs to your database. While Spooky2 already provides much of this functionality via the CSVed application, CSVed is cumbersome and difficult to use as it has no specific knowledge of the Spooky2 database parameters.
If you haven’t already, install DBEditor as described in Installing DBEditor. Double-click the DBEditor icon on the desktop to start DBEditor
The Initial Window
When you open DBEditor, the window starts with an empty Database Editor. This window may at times contain the Database Editor, the Program Editor, or the Frequency Editor, depending on which links or menu items you click.
Most of the operations available in DBEditor are in the menus.
File Menu
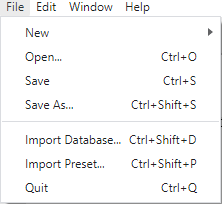
The New submenu is described below.
The Open… menu item opens a database into a new window. When chosen, an open dialog appears, and you can navigate the filesystem and choose a database file to open.
The Save menu item saves the current database. If the database is a new untitled database, a save dialog appears. In the save dialog, you give your database a new name and click the Save button to save the database. If you have saved a database that Spooky2 is currently using, you can use the Refresh Database command in Spooky2’s Database menu to read the contents of your updated database.
The Save As… menu item saves the current database into a new database file. Once chosen, a save dialog appears. In the save dialog, you give your database a new name and click the Save button to save the database. After the Save As operation, you are now viewing and editing the new database file.
The Import Database… menu item imports an existing database into your database. When chosen, a dialog titled Import Spooky2 Database opens. Choose a database to import, and click the Open button to finish the operation. The entries from the imported database are inserted into your database according to the insertion rules below.
When Import Database… is chosen while the Program Editor is visible, the imported frequencies will be added to the currently opened program according to the insertion rules below.
The Import Preset… menu item imports a Spooky2 preset into your database. When chosen, a dialog titled Import Spooky2 Preset opens. Choose a Spooky2 preset to import, and click the Open button to finish the operation. The entries from the imported preset are inserted into your database according to the insertion rules below.
When Import Preset… is chosen while the Program Editor is visible, the imported frequencies from the preset will be added to the currently opened program according to the insertion rules below.
The Quit menu item quits the DBEditor. If you have edited databases opened, you will have an opportunity to either save the edited database, not save the database, or to cancel the Quit operation.
New Submenu
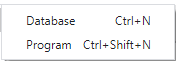
The Database menu item creates a new and empty database window. When you edit this new window/database, you are not affecting your current database.
The Program menu item creates a new and empty program in your current database. Chosing this menu item makes the Program Editor appear. In this editor, you give your program a name and frequencies.
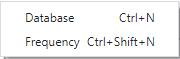
When you are in the Program Editor, you will see the second menu item in the New submenu change to Frequency. The Frequency menu item creates a new and empty frequency in your current program, and the Frequency Editor appears. In this editor, you set the frequency and the other properties that go with a frequency.
Edit Menu
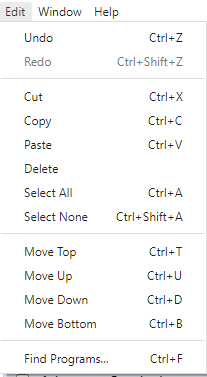
The Undo menu item un-does the last edit. You can choose this menu item until you get to the unedited database. If you are unhappy with the results of your undo operation, you can choose the Redo command to undo the undo. Make sure the text boxes or text areas are not selected when you chose this command, otherwise you will undo a text edit, rather than undo a database edit.
The Redo menu item un-does the last undo. You can choose this menu item until you get to the end of your undos that can be undone. Make sure the text boxes or text areas are not selected when you chose this command, otherwise you will redo a text edit, rather than redo a database edit.
The Cut menu item deletes the currently selected database or frequency entries (the entries whose checkboxes are ticked), and copies those entries to the clipboard. Make sure a text box or text area is not focused, otherwise this operation will appy to that text rather than the database.
The Copy menu item copies the currently selected database or frequency entries (the entries whose checkboxes are ticked) to the clipboard. Make sure a text box or text area is not focused, otherwise this operation will appy to that text rather than the database.
The Paste menu item pastes the contents of the clipboard to your database or program according to the insertion rules stated below. If any entry is selected, the pasted entries will go before the first selected entry. Make sure a text box or text area is not focused, otherwise this operation will appy to that text rather than the database.
The Delete menu item deletes all the entries in your database or program. You can also use the keyboard shorcut of the Delete and the Backspace key. If you deleted the wrong items, you can undo the deletion with the Undo menu command. Make sure a text box or text area is not focused, otherwise this operation will appy to that text rather than the database.
The Select All menu item selects all the entries in your database or program. Make sure a text box or text area is not focused, otherwise this operation will appy to that text rather than the database.
The Select None menu item de-selects all the selected entries in your database or program. Make sure a text box or text area is not focused, otherwise this operation will appy to that text rather than the database.
The Move Top menu item moves all the selected entries in your database or program to the front of the list. Make sure a text box or text area is not focused, otherwise this operation will appy to that text rather than the database.
The Move Up menu item moves all the selected entries in your database or program up one entry in the list. Make sure a text box or text area is not focused, otherwise this operation will appy to that text rather than the database.
The Move Down menu item moves all the selected entries in your database or program down one entry in the list. Make sure a text box or text area is not focused, otherwise this operation will appy to that text rather than the database.
The Move Bottom menu item moves all the selected entries in your database or program to the end of the list. Make sure a text box or text area is not focused, otherwise this operation will appy to that text rather than the database.
The Find Programs… menu item moves brings up the Find Programs dialog. This dialog allows you to search the built-in program database and add a built-in program to your database or add a built-in program’s frequencies to your program. This is described in more detail below.
Window Menu
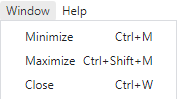
The Minimize menu item miminize the window.
The Maximize menu item toggles the maximize state of the window.
The Close menu item closes the current window. If the database is edited, you will have the opportunity to save, not save, or cancel the close operation.
Help Menu

The Toggle Developer Tools menu item toggles the developer tools of the window. This is only necessary if you are tracking down why an operation fails.
The Help menu item shows the help for the DBEditor.
About shows an about dialog.
Insertion Rules
When adding an entry or entries into the Database Editor or the Program Editor, the rules regarding where the entry or entries are inserted are the same whether you are importing, pasting, or adding new entries from a database or preset. This also applies to creating and adding a new program or a new frequency.
If in your current view, there are no entries whose checkboxes are ticked, the new entries are added at the end of the list of your existing entries. If there are one or more entries whose checkboxes are ticked, then the new entries are added before the first ticked entry in the list. After each checkbox is the name of the program. You click this name to view the program in the Program Editor.
Drag-and-Drop
Drag-and-Drop operations are initiated from the Windows File Explorer. You can drag-and-drop multiple files from the Windows File Explorer into the Database Editor or the Program Editor. In the Windows File Explorer, you first highlight the database or preset files you want to import. You can click on a single file, or use the Control-Click on a file to add it to the list of highlighted files. When you have highlighted all the files you want to import, drag one of highlighted file icons into the DBEditor. This will import the database or preset files that are in the collection of highlighted files.
In your Database Editor or Program Editor window, the added entries from the database or preset will be added to the currently opened database/program according to the insertion rules below.
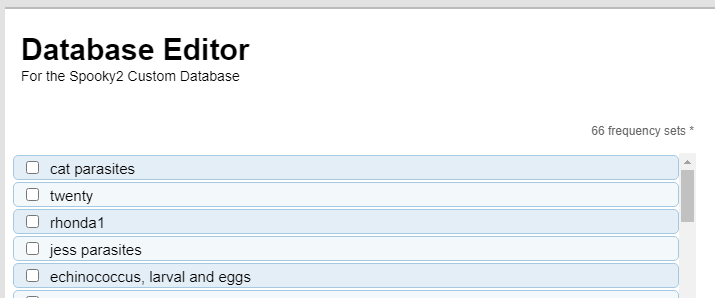
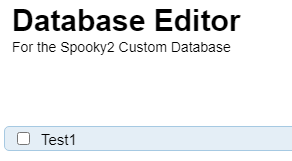
Database Editor
The first editor you see in the DBEditor is the Database Editor. Initially this window is empty. You can use the Open… menu command to open a database in your file system. You can import a database via the Import Database… menu command, or drag-and-drop a database file from the Windows File Explorer. You can import a preset via the Import Preset… menu command, or drag-and-drop a preset file from the Windows File Explorer.
To add a new program to the database, choose the Program menu command in the New submenu of the File menu. After you fill in the entries, click the OK button to save your results. Clicking Cancel will discard your changes.
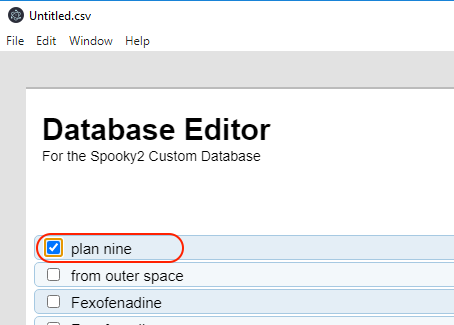
After opening a database, the Database Editor display the programs in a list. Each program entry starts with a checkbox, which you tick for the operations in the Edit menu. Following the checkbox is the program name. Clicking on the name will open that program in the Program Editor.
When you are happy with the edits you’ve made and are ready to save your changes, click either Save or Save As… in the File menu to save your changes.
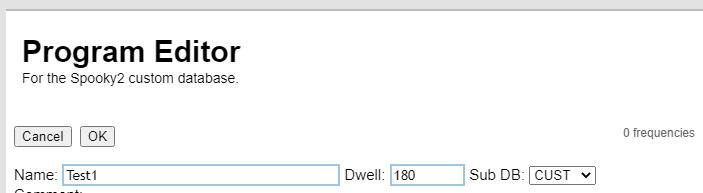
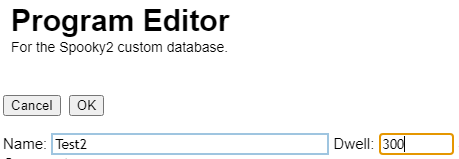
Program Editor
Clicking on a frequency set name, you see the contents of that program in the Program Editor. Choosing the Program menu command also brings up the Program Editor.
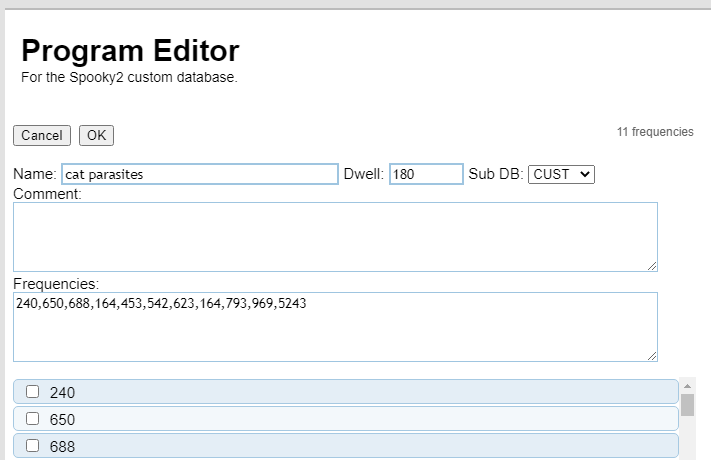
Cancel discards your changes and returns you to the Database Editor.
OK accepts your changes into the current program and returns you to the Database Editor.
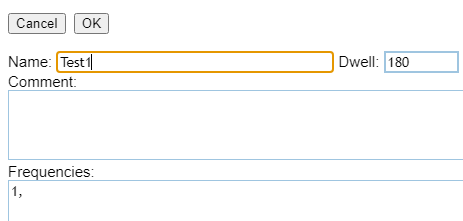
Name is the name of the program.
Dwell is the optional default dwell for the program.
Sub DB is the sub database for your program. Normally you only use CUST unless you enter in a program from another database.
Comment is the optional comment or instructions for your program.
Frequencies are the frequencies of the program. This field displays the same information as the list of frequencies below the form. Beginner users need not use this field, as the edits to the program can be made using the list of frequencies below this form. Advanced users can enter values into this field, using the same codes that are found in the Frequencies text field of the Create Program dialog of Spooky2.
Each frequency entry starts with a checkbox, which you tick for the operations in the Edit menu. Following the checkbox is the frequency. Clicking on the frequency will open that frequency in the Frequency Editor.
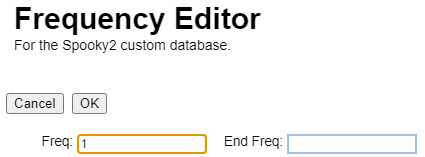
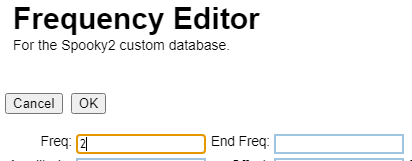
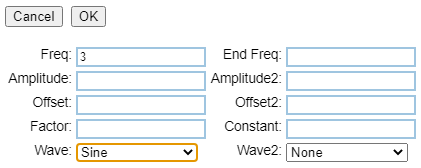
Frequency Editor
Clicking on a frequency in the Program Editor, you see the contents of that frequency in the Frequency Editor. Choosing the Frequency menu command also brings up the Frequency Editor.
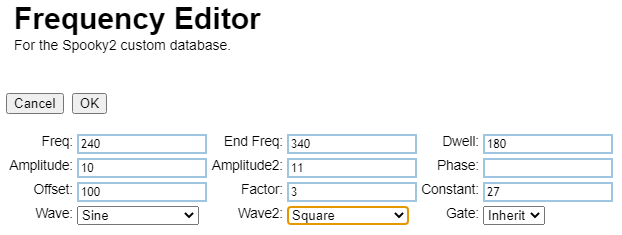
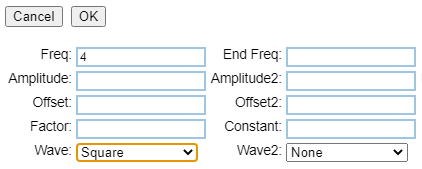
OK accepts your changes into the current frequency and returns you to the Program Editor.
Cancel discards your changes and returns you to the Program Editor.
Freq is the current frequency. For a sweep, Freq is the beginning frequency.
End Freq is the optional end frequency of a sweep. For non-sweep item, this field is empty.
Dwell is the optional dwell in seconds for this frequency.
Amplitude is the optional amplitude in volts. If you specify an amplitude, you must choose a value between 0 and 20.
Amplitude2 is the optional amplitude in volts for Out 2. If you specify an amplitude, you must choose a value between 0 and 20.
Phase is the optional offset in degrees. If you specify phase, you must choose a value between greater than or equal to 0
Offset is the optional offset in percentage. If you specify an offset, you must choose a value between -100 and 100.
Factor is the optional Out 2 multiplication factor.
Constant is the optional Out 2 constant added to the Out 1 times the factor.
Wave is the optional wave form. The default is None.
Wave2 is the optional wave form for Out 2. The default is None.
Gate is the optional gate. The default for gate is Inherit.
Find Programs
Choosing the Find Programs… menu item in the Edit menu opens the Find Programs dialog.
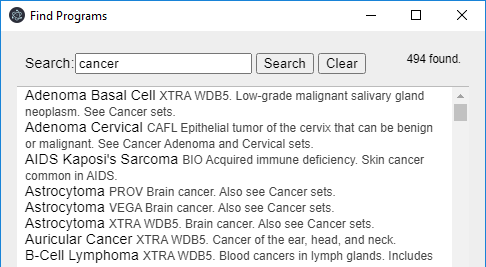
The Search text field is the word, text, or pattern for which you wish to search.
The Search button searches the built-in frequency database for your search pattern. If found, the search operation displays results under the form. If you find a program you like, click the program and the Find Programs dialog appends those frequencies to your program.
Clear empties the content of the Search text field and the search results below.
Tutorials
Create a New Database
In this tutorial we create a new database called My Frequencies.csv, with the following programs.
- Test1 with frequencies 1 Hz and 2Hz
- Test2 with a dwell of 300 seconds, containing frequencies 3 Hz with Sine wave, and a sweep 4-10 Hz with Square wave and offset 100%.
1. Choose Database in the New submenu of the File menu.
2. In the New submenu of the File menu, choose Program. You are now in the Program Editor.
3. In the Name field, type Test1.
4. Choose Frequency in the New submenu of the File menu. You are now in the Frequency Editor.
In the Freq field, type 1, and then the Enter key. Typing the Enter key is equivalent to clicking the OK button.
5. You are back in the Program Editor.
To add the second frequency, choose Frequency in the New submenu of the File menu.
6. You are now in the Frequency Editor again.
7. In the Freq field, type 2, and then the Enter key. You are back in the Program Editor.
8. Either click the OK button, or type the Enter key. You are now back in the Database Editor.
9. In the New submenu of the File menu, choose Program. You are now in the Program Editor.
10. Type Test2 into the Name field.
11. Type 300 into the Dwell field.
12. Choose Frequency in the New submenu of the File menu. You are now in the Frequency Editor.
Type 3 into the Freq field.
14. Choose Sine in the Wave popup list. Type the Enter key. You are back in the Program editor.
15. To add the second frequency, choose Frequency in the New submenu of the File menu. You are now in the Frequency Editor again.
16. In the Freq field, type 4.
17. In the End Freq field, type 10.
18. In the Offset field, type 100, and then type the Enter key. You are now in the Program Editor.
19. Choose Square in the Wave popup list.
20. Type the Enter key. You are now in the Database Editor.
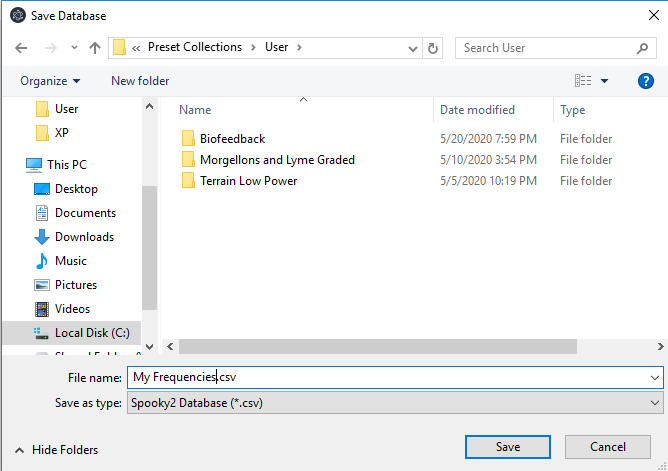
21. Choose Save in the File menu. The Save Dialog is now open.
22. Navigate the Save dialog to the Spooky2 User folder. The steps for this are to click on Local Disk (C:) in the left column, double-click Spooky2 in the right column, double-click Preset Collections, double-click User., Type My Frequencies.csv into the File name field, then click the Save button.
For the advanced users, steps 4 through 19 of the above tutorial can be made in far fewer operations. Here are those operations (starting from Step 4):
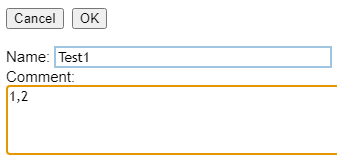
4. In the Frequencies text field, type 1,2 and type the Enter key. You are now in Database Editor.
5. In the New submenu of the File menu, choose Program. You are now in the Program Editor for the second program.

6. Type Test2 into the Name field.
7.Type 300 into the Dwell field.
8. Type 3 W1,4-10 W2 O100 into the Frequencies field. Type the Enter key. This returns you to the Database Editor. At this point you can save your new database.
Merge Two Databases
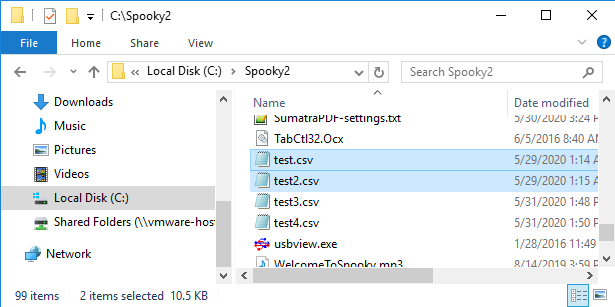
1. In this tutorial we merge two different databases to create new.csv. I know I have 2 database files in my Spooky2 folder, so using the Windows File Explorer, I click Local Disk (C:) in the left column, and double-click Spooky2 in the right column. Then I scroll down the right column until I find my database files. Here in the picture I have selected 2 databases, so that I may drag-and-drop both of them at the same time.
2. In the Database Editor, I want to start with an empty database. To do this, if I am not already looking at an empty database, I choose Database from the New submenu of the File menu.
3. The area circled in red is where I want to drop the files from the drag-and-drop operation
4. Choose Save in the File menu. In the Save dialog, type new.csv into the File name field, and click the Save button.
5. If I want the new contents from a drag-and-drop to be at a specific place, let’s say the beginning of my database, I click the entry where I want the inserted entries to be placed before. The insertion rules for drag-and-drop are explained here.